Gateway List
Jump to navigation
Jump to search
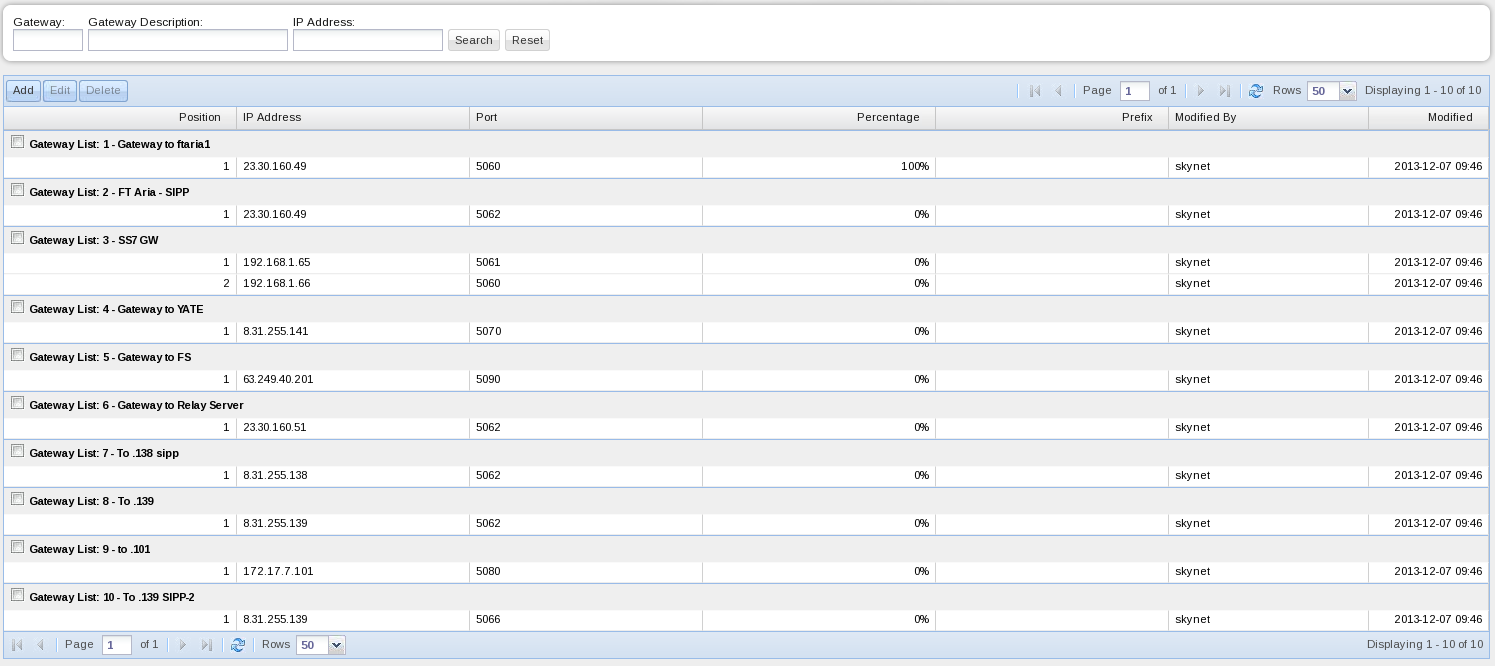
Figure 26. Gateway List Window.
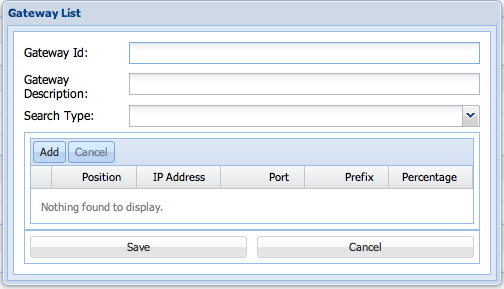
Figure 27. Gateway List Addition Window.
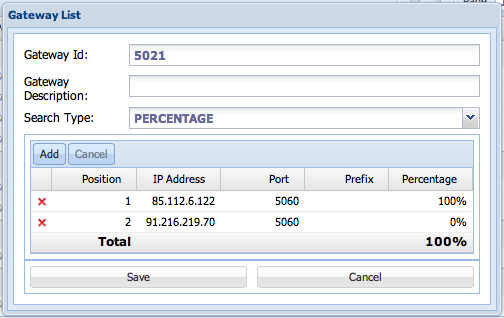
Figure 28. Gateway List Edition Window.
Click Here to return to the main Screen: Back
This is the list of IP addresses associated with the outbound routes. The Gateway List is assigned in the Called Post Translation process. Post translations must be filled in for every outbound resource group.

Figure 26 shows the Gateway List window. Following is an explanation of each field in the table:
- Position - This is the position of the IP address in the Gateway List.
- IP Address and Port - This is the carrierâs IP address and Port
- Percentage - If the Percentage scheme is used this field represents the percentage of calls each IP address handle in the Gateway List. Least Cost means that the first option will be the IP Address in position 1. If for any reason it does not connect, the system will try the IP Address in position 2 and so fort
- Prefix - This field defines the prefix to be included for all the DNIs for that specific IP address.
- Modified By - The system fills this field with the username of the person who performed the modification.
- Modified - The system fills this field automatically with the date of the last modification of the Gateway List.
To create a Gateway List:
- Click âAddâ to create a new Gateway List. The following window will appear:

- Enter the Gateway List Id. If you enter an existing Id, the system will display a visual alert and a text box saying âGateway List âxâ already existâ.
- Type a brief description of the Gateway List if needed.
- Select the Search Type. You can chose here between Least Cost or Percentage schemes.
- Click âAddâ to create a new row in the Gateway List and fill in the technical parameters: Position, IP Address, Port, Prefix, and Percentage. As you fill the fields, a red flag in the upper right corner will appear to denote an addition pending for recording.
- Add more lines if needed or click âSaveâ to confirm the addition of the new Gateway List, or âCancelâ to discard it. Use the x to delete lines in the Gateway List if needed.
To delete an existing Gateway List select the check box next to the list and click âDeleteâ.
To edit an existing Gateway List select the check box next to the list and click âEditâ. The system will display the Gateway List window with editable fields as shown in the following figure:
