User Group Management
Click Here to return to the Sky Central Quick Start: Back
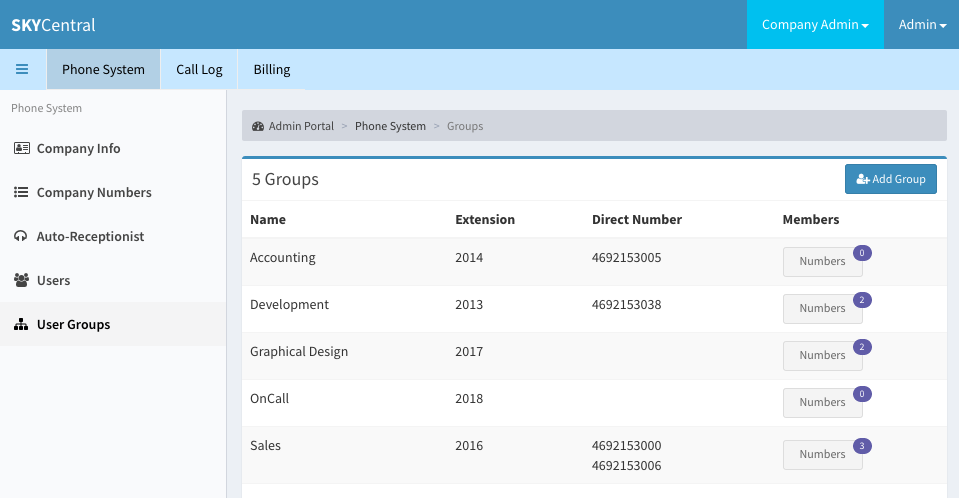
Users who have similar responsibilities or who can be the backup for each other may be grouped into one user group. User group's phone numbers can be an extension or a Direct Inward Dialing (DID) number. All the DIDs or extensions within the user group can be notified when a caller calls into this user group's phone number.
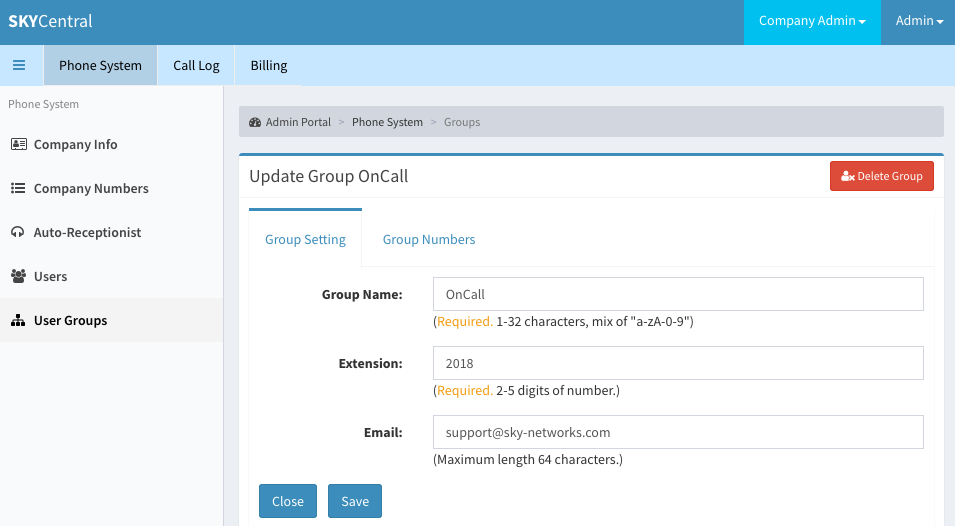
User group configuration page can be access by:
1. Login as the company's admin user
2. Click on "Phone System" tab
3. Click on "User Groups" link (on the left panel)
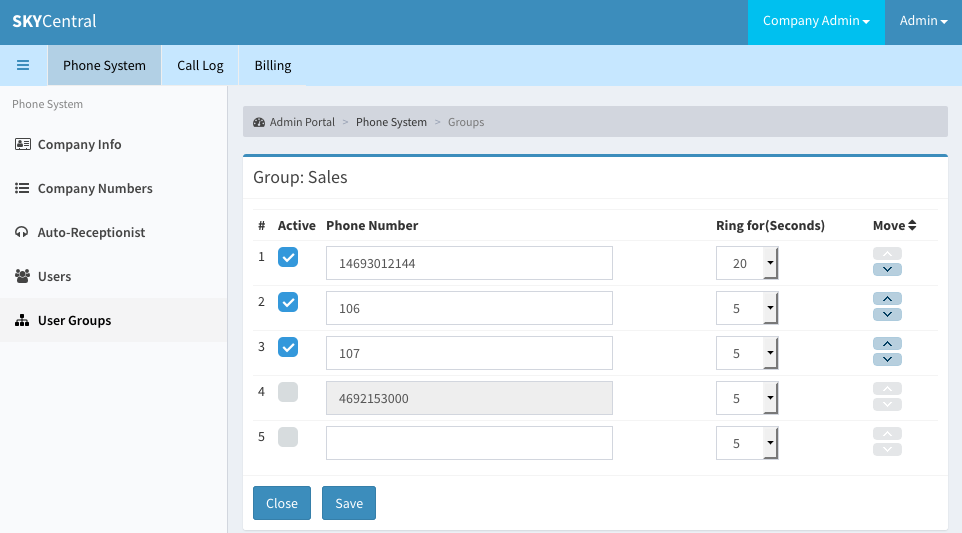
To review or update the DIDs or extensions assigned to the user group, click on the "Members" icon on the right side of the page. Note: the purple color digit on the upper right of the "Members" icon is the indicator for the number of extensions/DIDs currently assigned to this group.
Tip: To setup the last number in the dial group to route to voicemail you can enter it as follows: <ext>*<company domain> - for example 104*company1.sky-networks.com will route the call to extension 104 at company1.sky-networks.com and if that extension is not actively registered, the call will route to voicemail.
Moving a DID or an extension's position within the group, using the Up and Down arrows, defines the sequence when the DID or the extension will ring next in the queue.
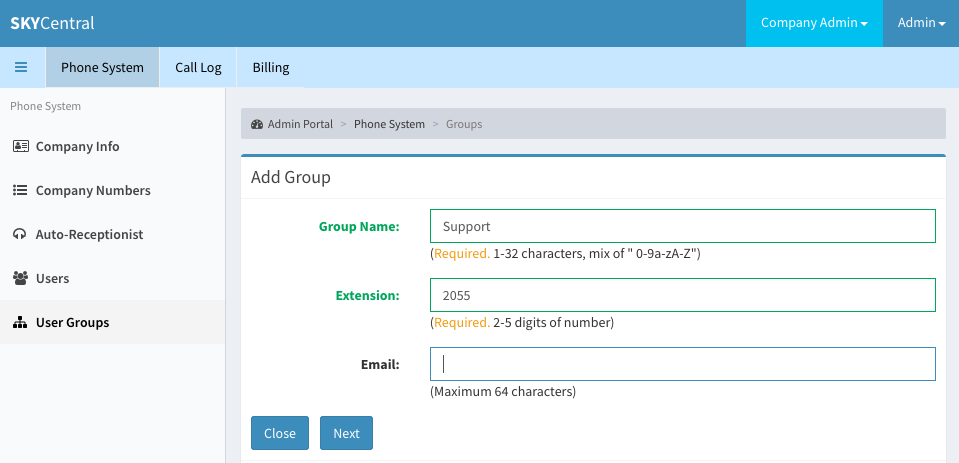
To add a new user group, click on the "Add Group" icon on the upper right corner of the screen and populate the group information in the "Add Group" page:
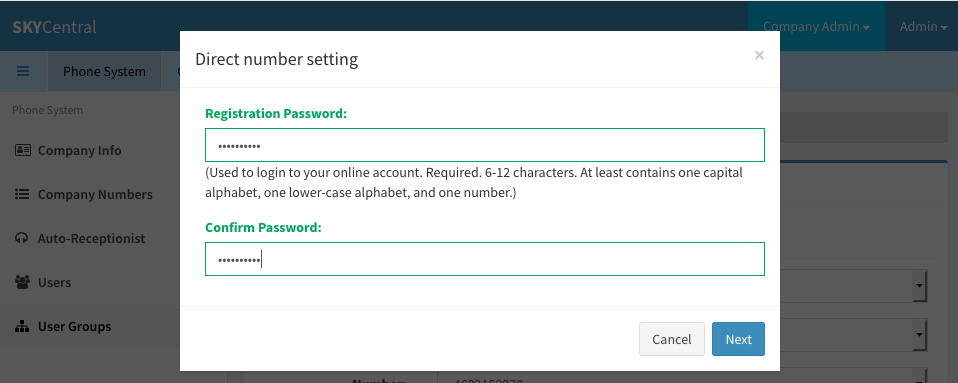
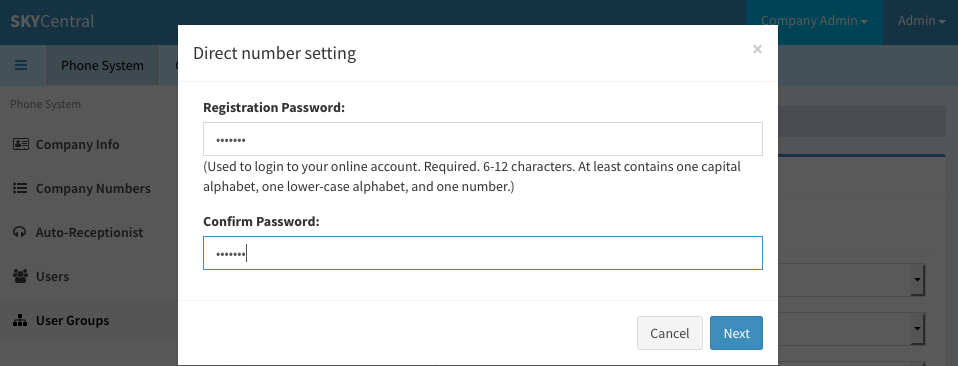
Select the SIP registration password for this extension.
The user group is created once the group number charge information is confirmed:
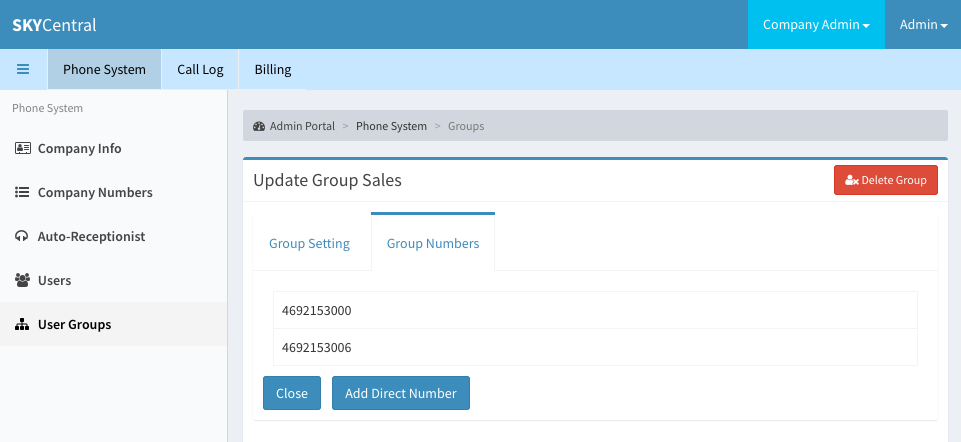
DID number(s) can be assigned to a work group. This means the external callers may call into the user groups directly, without going through the company's main number. To assign a DID to the user group:
1. Login as the company's admin user
2. Click on "Phone System" tab
3. Click on "User Groups" link (on the left panel)
4. Click on the user group which needs to have DID assigned
5. Click on the "Group Numbers" link
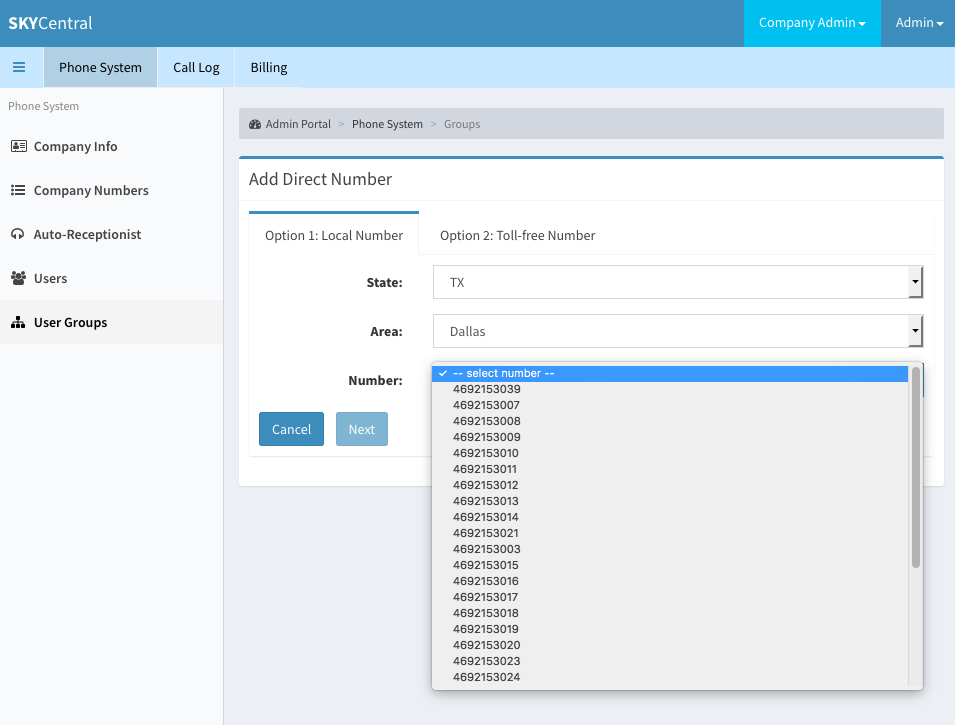
6. Click on "Add Direct Number" icon
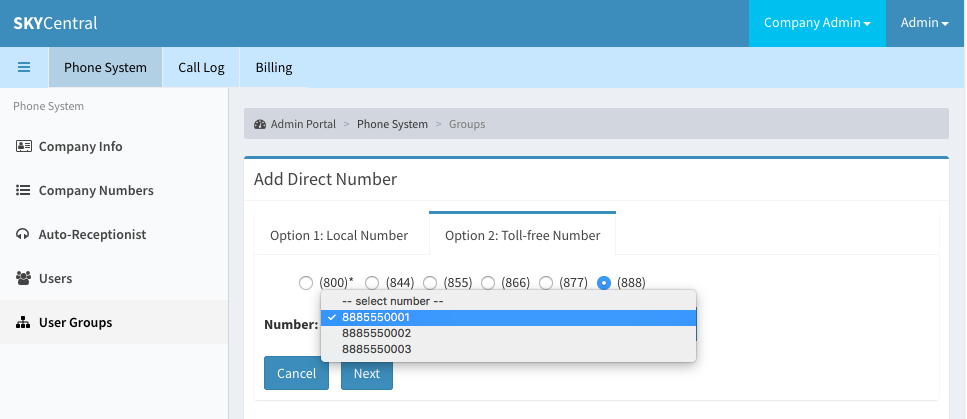
7. Select "Option 1: Local Number" to assign a local number to the user group. Or, click on "Option 2: Toll-free Number" option to assign a 8xx numbers to the user group.
8. Configure the SIP registration password for the DID.
9. The group DID number will start ringing the extensions and the DIDs within the group once the charge information is confirmed.
User group can be delete by:
1. Login as the company's admin user
2. Click on "Phone System" tab
3. Click on "User Groups" link (on the left panel)
4. Click on the user group which needs to be deleted
5. Click on the red "Delete Group" icon on the upper right of the page
6. Confirm the delete action
